How to Use Markdown in VSCode – Syntax and Examples

[ad_1]
Markdown is a lightweight markup language for creating formatted text using a plain-text editor. It is widely used for creating README files, documentation, and other forms of text.
Visual Studio Code (VSCode) is a popular source code editor that provides excellent support for Markdown, making it easy for developers, writers, and anyone creating textual content to use Markdown effectively.
To follow through this tutorial, you must have VSCode installed on your computer and know how to navigate it.
Importance of Using Markdown in Visual Studio Code (VSCode)
The combination of Markdown and VSCode provides a user-friendly and efficient environment for writing, editing, and formatting text, which makes it a suitable choice for developers, writers, and content creators.
The following are some of the key reasons to use markdown in VSCode:
- Markdown in VSCode supports code snippets and syntax highlighting for various programming languages, making it suitable for documenting code and technical content.
- VSCode provides a built-in preview feature that you can access by clicking the preview icon at the screen’s top right corner. This allows you to see your raw markdown file alongside what it will look like when you publish it on the internet. This feature also helps you spot and fix simple mistakes as you go.
- Many project repositories on platforms like GitHub use Markdown for documentation. Getting familiar with Markdown in VSCode ensures a smooth transition when contributing to open-source projects or collaborating with teams using similar documentation standards.
- You do not need to be connected to the internet to use markdown in VSCode. You can work offline and still have access to all its features.
- For developers, you can easily push your document to GitHub using VSCode’s built-in terminal. This also allows for multiple persons to review and work on the same document.
How to Create a Markdown File in VSCode
Follow the steps below to create your markdown file in VSCode:
- Create a folder on your computer to store your documents.

2. Launch your VSCode app.
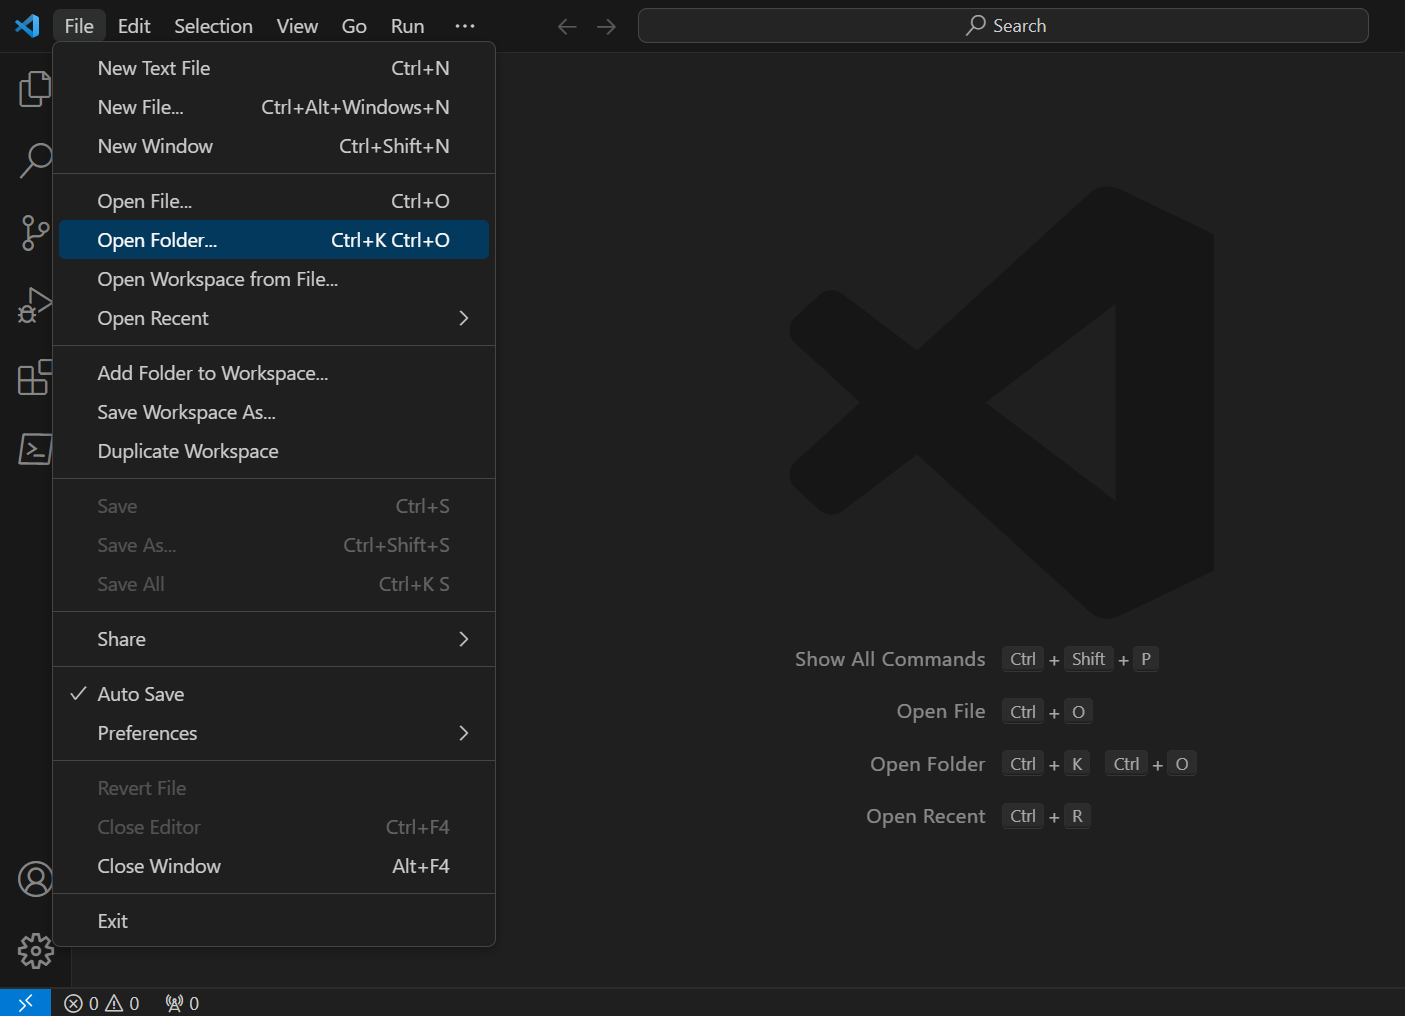
3. After launching your app, click on ‘File’, and then on ‘Open Folder’ to open the folder you just created.

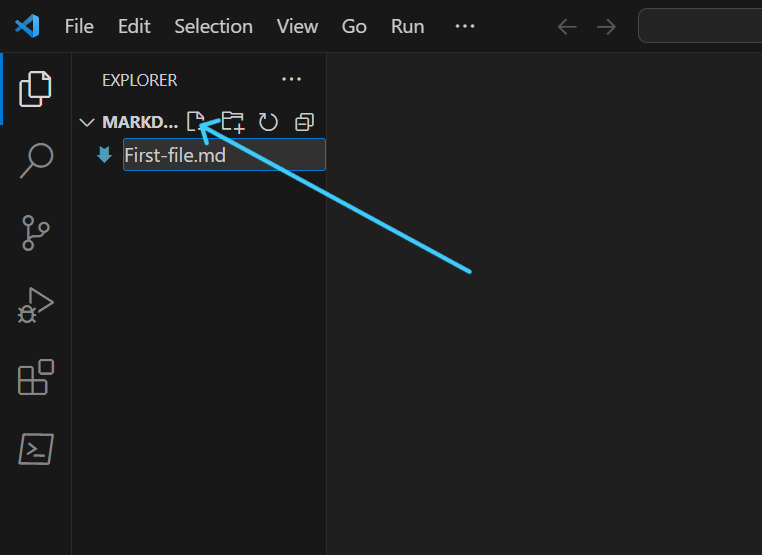
4. Inside your folder, click on the file symbol and create a file that ends with ‘.md'(For example, First-file.md).

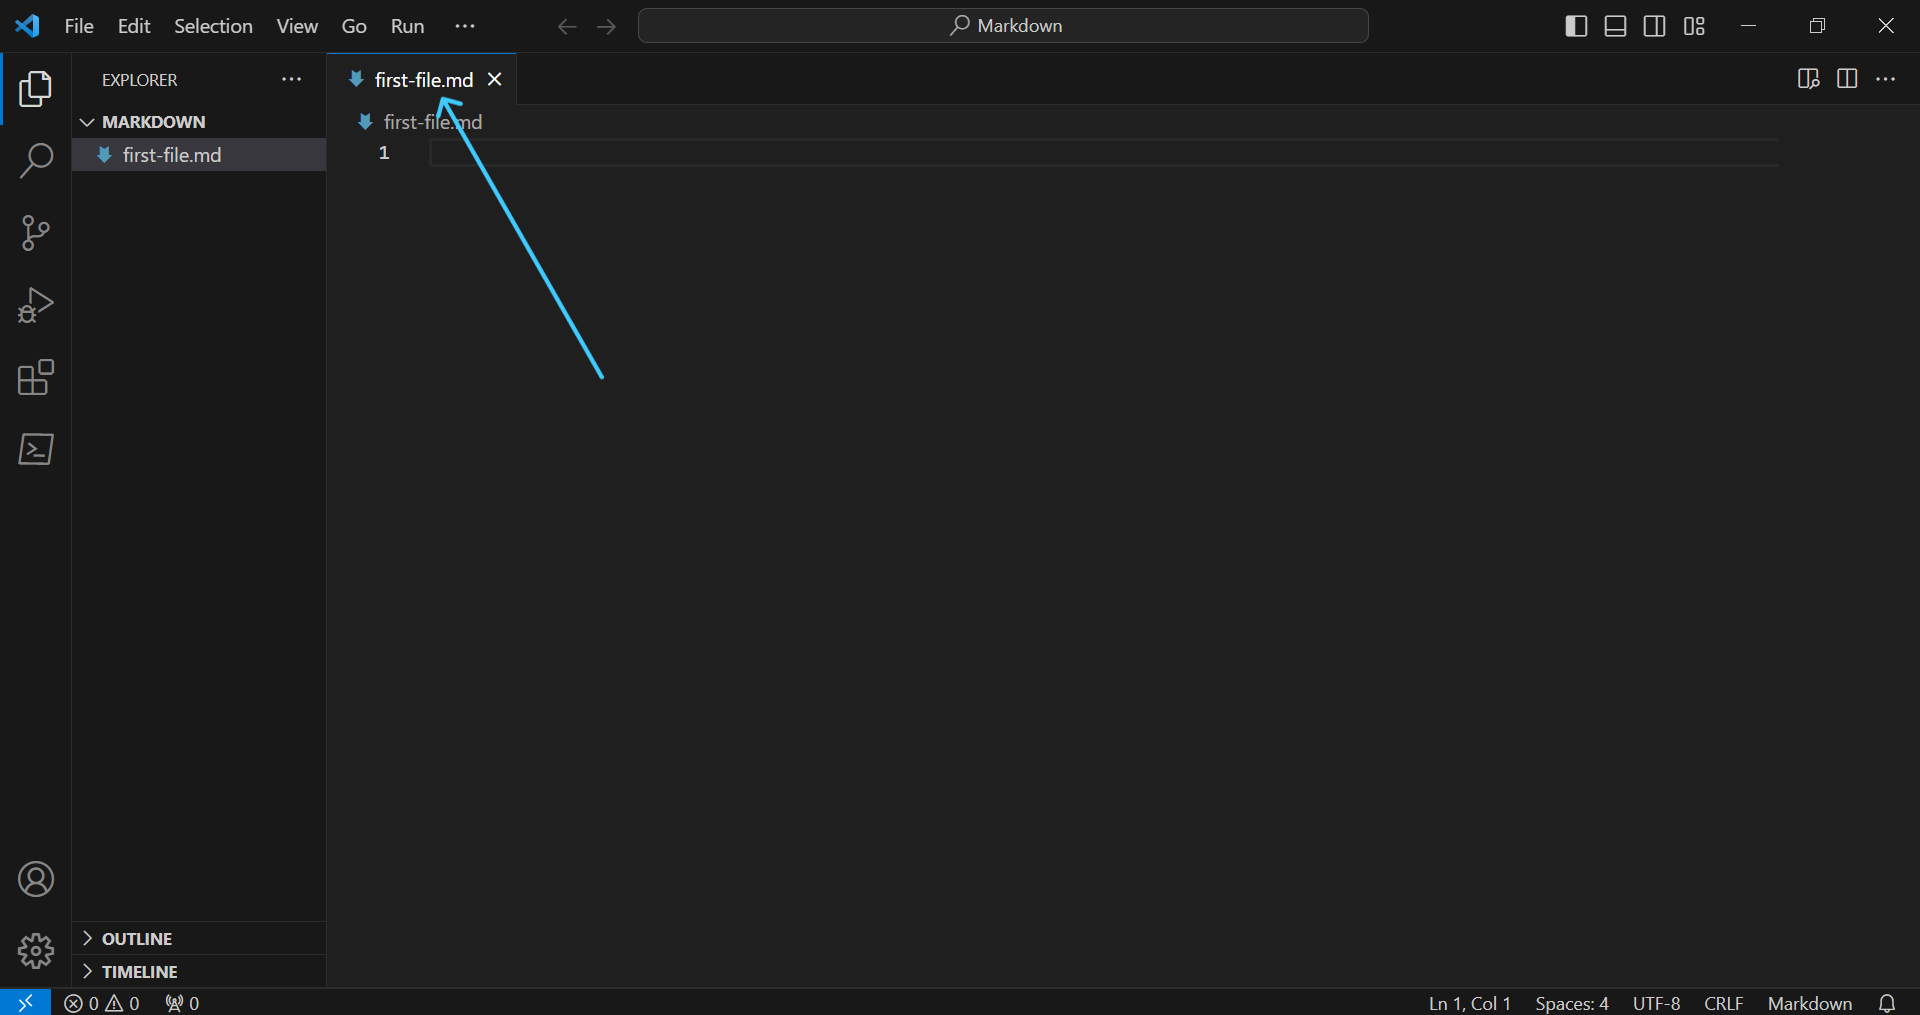
5. Press enter after typing your file name and your document page will open up. You are now all set and can start writing.

Markdown Syntax
Markdown syntax is a collection of symbols/annotations you add to your text to tell each word or phrase what it should be doing.
Let’s go through some of the most useful markdown syntax and features.
To create headers, add the pound/hash symbol (#) in front of your text. The number of pound symbols determines the header level.
For example:
 # Header 1
 ## Header 2
 ### Header 3
 #### Header 4
 ##### Header 5
 ###### Header 6
Result:
Lists
There are two types of lists in Markdown, the ordered list and the unordered list. To create an ordered list, just use numbers followed by a period (like 1.). To create an unordered list, add an asterisk, a plus sign, or a hyphen in front of your text (*, + or, -) and it will start an unordered list.
For example
Ordered List
 1. First List
 2. Second List
    1. Sublist 2.1
    2. Sublist 2.2

 Unordered List
 * List 1
 * List 2
    + Sublist 1.2
    + Sublist 2.2
 - Item a
 - item b
Result
Ordered List
- First List
- Second List
- Sublist 2.1
- Sublist 2.2
Unordered List
Code
You can represent code in two ways in markdown: as inline code (like this), and as a codeblock (which you’ll see below).
To create inline code, place your text within two backticks (“), for example:
`inline code`Result:
inline code
To create a code block, enclose your code in triple backticks (“`) at the beginning and end of the code block. You can also specify the programming language by adding the name of the language right after the first 3 backticks.
Here’s an example:
```
def codeblock_example():
    print("Hello world!")
```
Result
def codeblock_example():
    print("Hello world!")
Here’s an example code block in Python:
```python
def codeblock_example():
    print("Hello world!")
```
Result
def codeblock_example():
    print("Hello world!")
Tables
You can create a table using pipes and hyphens (| and -). The pipes divide your table into columns, while the hyphens create a horizontal line.
Here’s an example of creating a basic table in Markdown:
| Header 1 | Header 2 | Header 3 | Header 4 |
| -------- | -------- | -------- | -------- |
| Row 1, Col 1 | Row 1, Col 2 |Row 1, Col 3 | Row 1, Col 4 |
| Row 2, Col 1 | Row 2, Col 2 |Row 2, Col 3 | Row 2, Col 4 |
Result:
| Header 1 | Header 2 | Header 3 | Header 4 |
|---|---|---|---|
| Row 1, Col 1 | Row 1, Col 2 | Row 1, Col 3 | Row 1, Col 4 |
| Row 2, Col 1 | Row 2, Col 2 | Row 2, Col 3 | Row 2, Col 4 |
Blockquotes
The greater than sign (>) allows you to create a blockquote. You can add this sign in front of your statement or quote and it will indent and italicize the quote to set it apart from the rest of the text.
For example:
> "The technology you use impresses no one. The experience you create with it is everything."
> Sean Gerety - UX leader
Result:
“The technology you use impresses no one. The experience you create with it is everything.”
Sean Gerety – UX leader
Links
You can create or add links to your document using square brackets and parentheses ([] and ()). Square brackets store the link text, while parentheses store the link URL.
For example:
[freeCodeCamp](https://www.freecodecamp.org/news/)Result:
The result is a clickable link that takes you to the freeCodeCamp site.
Images
Adding images to your document is similar to adding links. The only difference is, you lead with an exclamation mark in front of the brackets and parentheses.
For example:

The result is the image of a cat.
Emphasis
To emphasize text or make it italic, you can wrap it in single (for italics) or double (for bold) asterisks or underscores (* or _).
For example:
*italic* or _italic_
**bold** or __bold__
Result:
italic or italic
bold or bold
As you can see above, a single asterisk and underscore give your text an italic form while a double asterisk and underscore make your text bold.
Escaping Characters
To display literal characters in markdown syntax, so they appear in your document without formatting it, you need to escape them using the backslash (\).
\_literal underscore\_Result:
_literal underscore_
HTML
Markdown supports using HTML tags for more advanced formatting when there’s a need for it.
Below are some of the ways you can use HTML tags in markdown:
- Images with HTML Attributes
<img src="https://www.freecodecamp.org/news/how-to-use-markdown-in-vscode/image_url.jpg" alt="Alt text" width="300" height="200">The HTML attribute within the image tag allows you to control properties like the width and height of the image.
- Styling with HTML and CSS
<span style="color:green">This is a green text.</span>Result:
This is a green text.
You can include inline CSS styles for more advanced styling in your document.
<iframe width="500" height="300" src="https://www.nova.com/embed/example-video" frameborder="0" allowfullscreen></iframe>You can embed videos in your document using the iframe HTML tag. The attributes within the tag allow you to control the video properties.
Conclusion
This tutorial introduced you to using Markdown in VSCode. You learned how to initiate a Markdown file in VSCode, and you saw some common Markdown syntax. I hope you understand its importance for technical writers and content creators.
The synergy between Markdown and VSCode not only enhances productivity but also ensures a smooth transition into the world of standard documentation.
Whether you’re writing technical documentation or contributing to collaborative coding efforts, you should now be equipped with a valuable skillset to help you effectively communicate and present your ideas.
[ad_2]
Source link
